Desktop | Cross-platform remote desktop, one click from the device menu
No RDP or VNC to configure, and no third-party remote software to install
Pick a device in HomiPlay, choose Remote Desktop, and you are in
Overview
Traditional remote desktop usually means a VPN, a static IP, or port forwarding, and often a third-party remote tool on top. Setup is tedious, and every opened port widens your exposure to the public internet.
HomiPlay has remote desktop built in. It creates a secure virtual network between your devices and streams the screen back over its own transport. You do not enable the operating system's remote desktop service, and you never type an IP address. As long as both devices are signed in to the same account and online, choose "Remote Desktop" from the device menu and the session opens.
Once connected, you can switch which display you are viewing (including an "All displays" view), adjust quality to match your network, and toggle between view-only and full remote control. When the two machines run different operating systems, built-in shortcut translation maps your local shortcuts to the remote OS so you do not have to rewire your habits.
⚡ Simpler: No network configuration and no system remote desktop service to enable. Install, sign in, and connect.
🚀 Smoother: Adaptive quality adjusts to your network, so control stays responsive and feels local.
🔐 Safer: No third-party relay and no exposed ports, which keeps the attack surface small.
Benefits
No VPN, static IP, or port forwarding, and no extra remote desktop software to install
Connect freely between Windows, macOS, Linux, Android, iPhone, and iPad without operating system restrictions
View a single display or all displays at once, with auto, high, balanced, and smooth quality modes
Automatic shortcut translation across operating systems, so moving between Mac and Windows stays natural
Switch to view-only mode to avoid accidentally interacting with the remote device
No exposed ports and no third-party relay, so the connection path stays short and private
How It Works
Install HomiPlay on Both Devices and Sign In
Install HomiPlay on the device you will control from and the device you will control, then sign in to the same account on both. Return to the dashboard and confirm the target device shows as "online." Note: remote desktop supports Windows, macOS, Linux, Android, iPhone, and iPad.
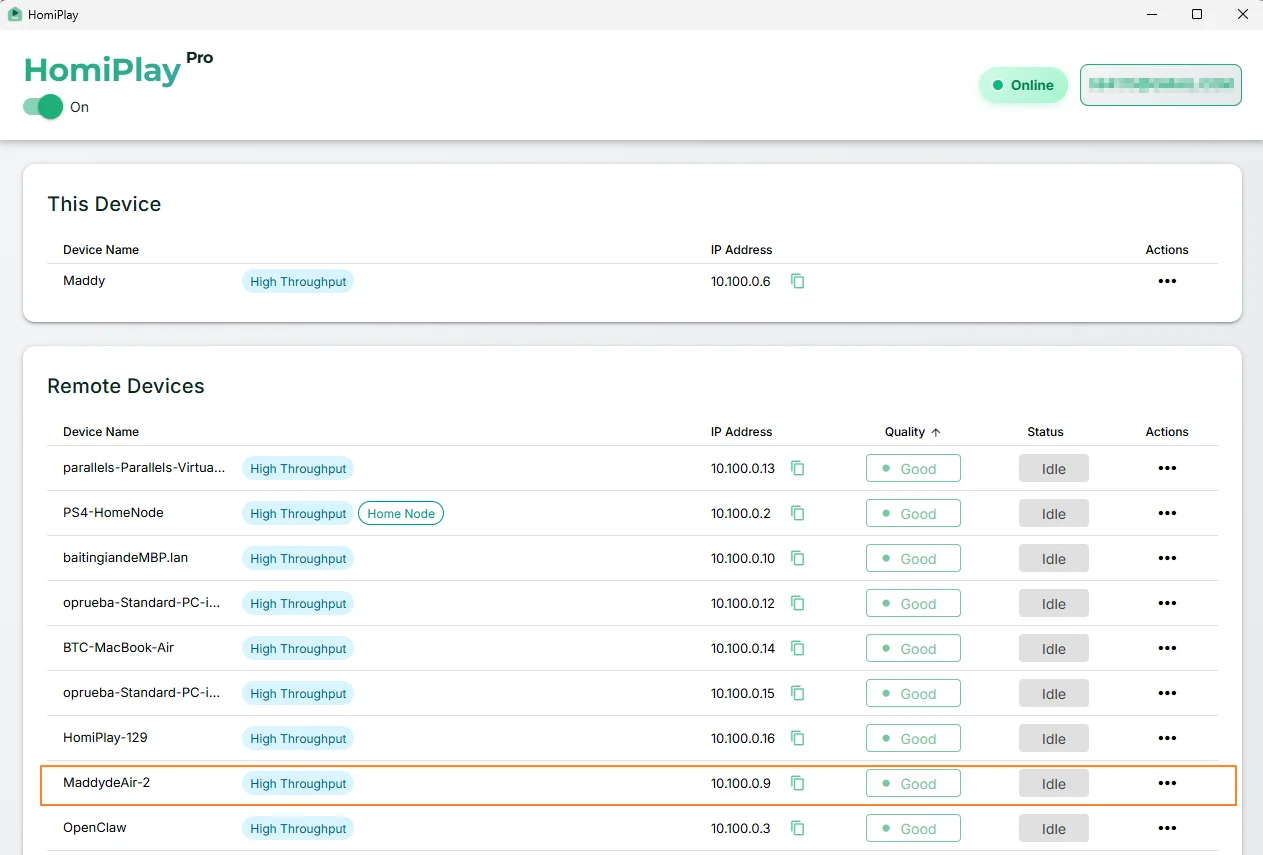
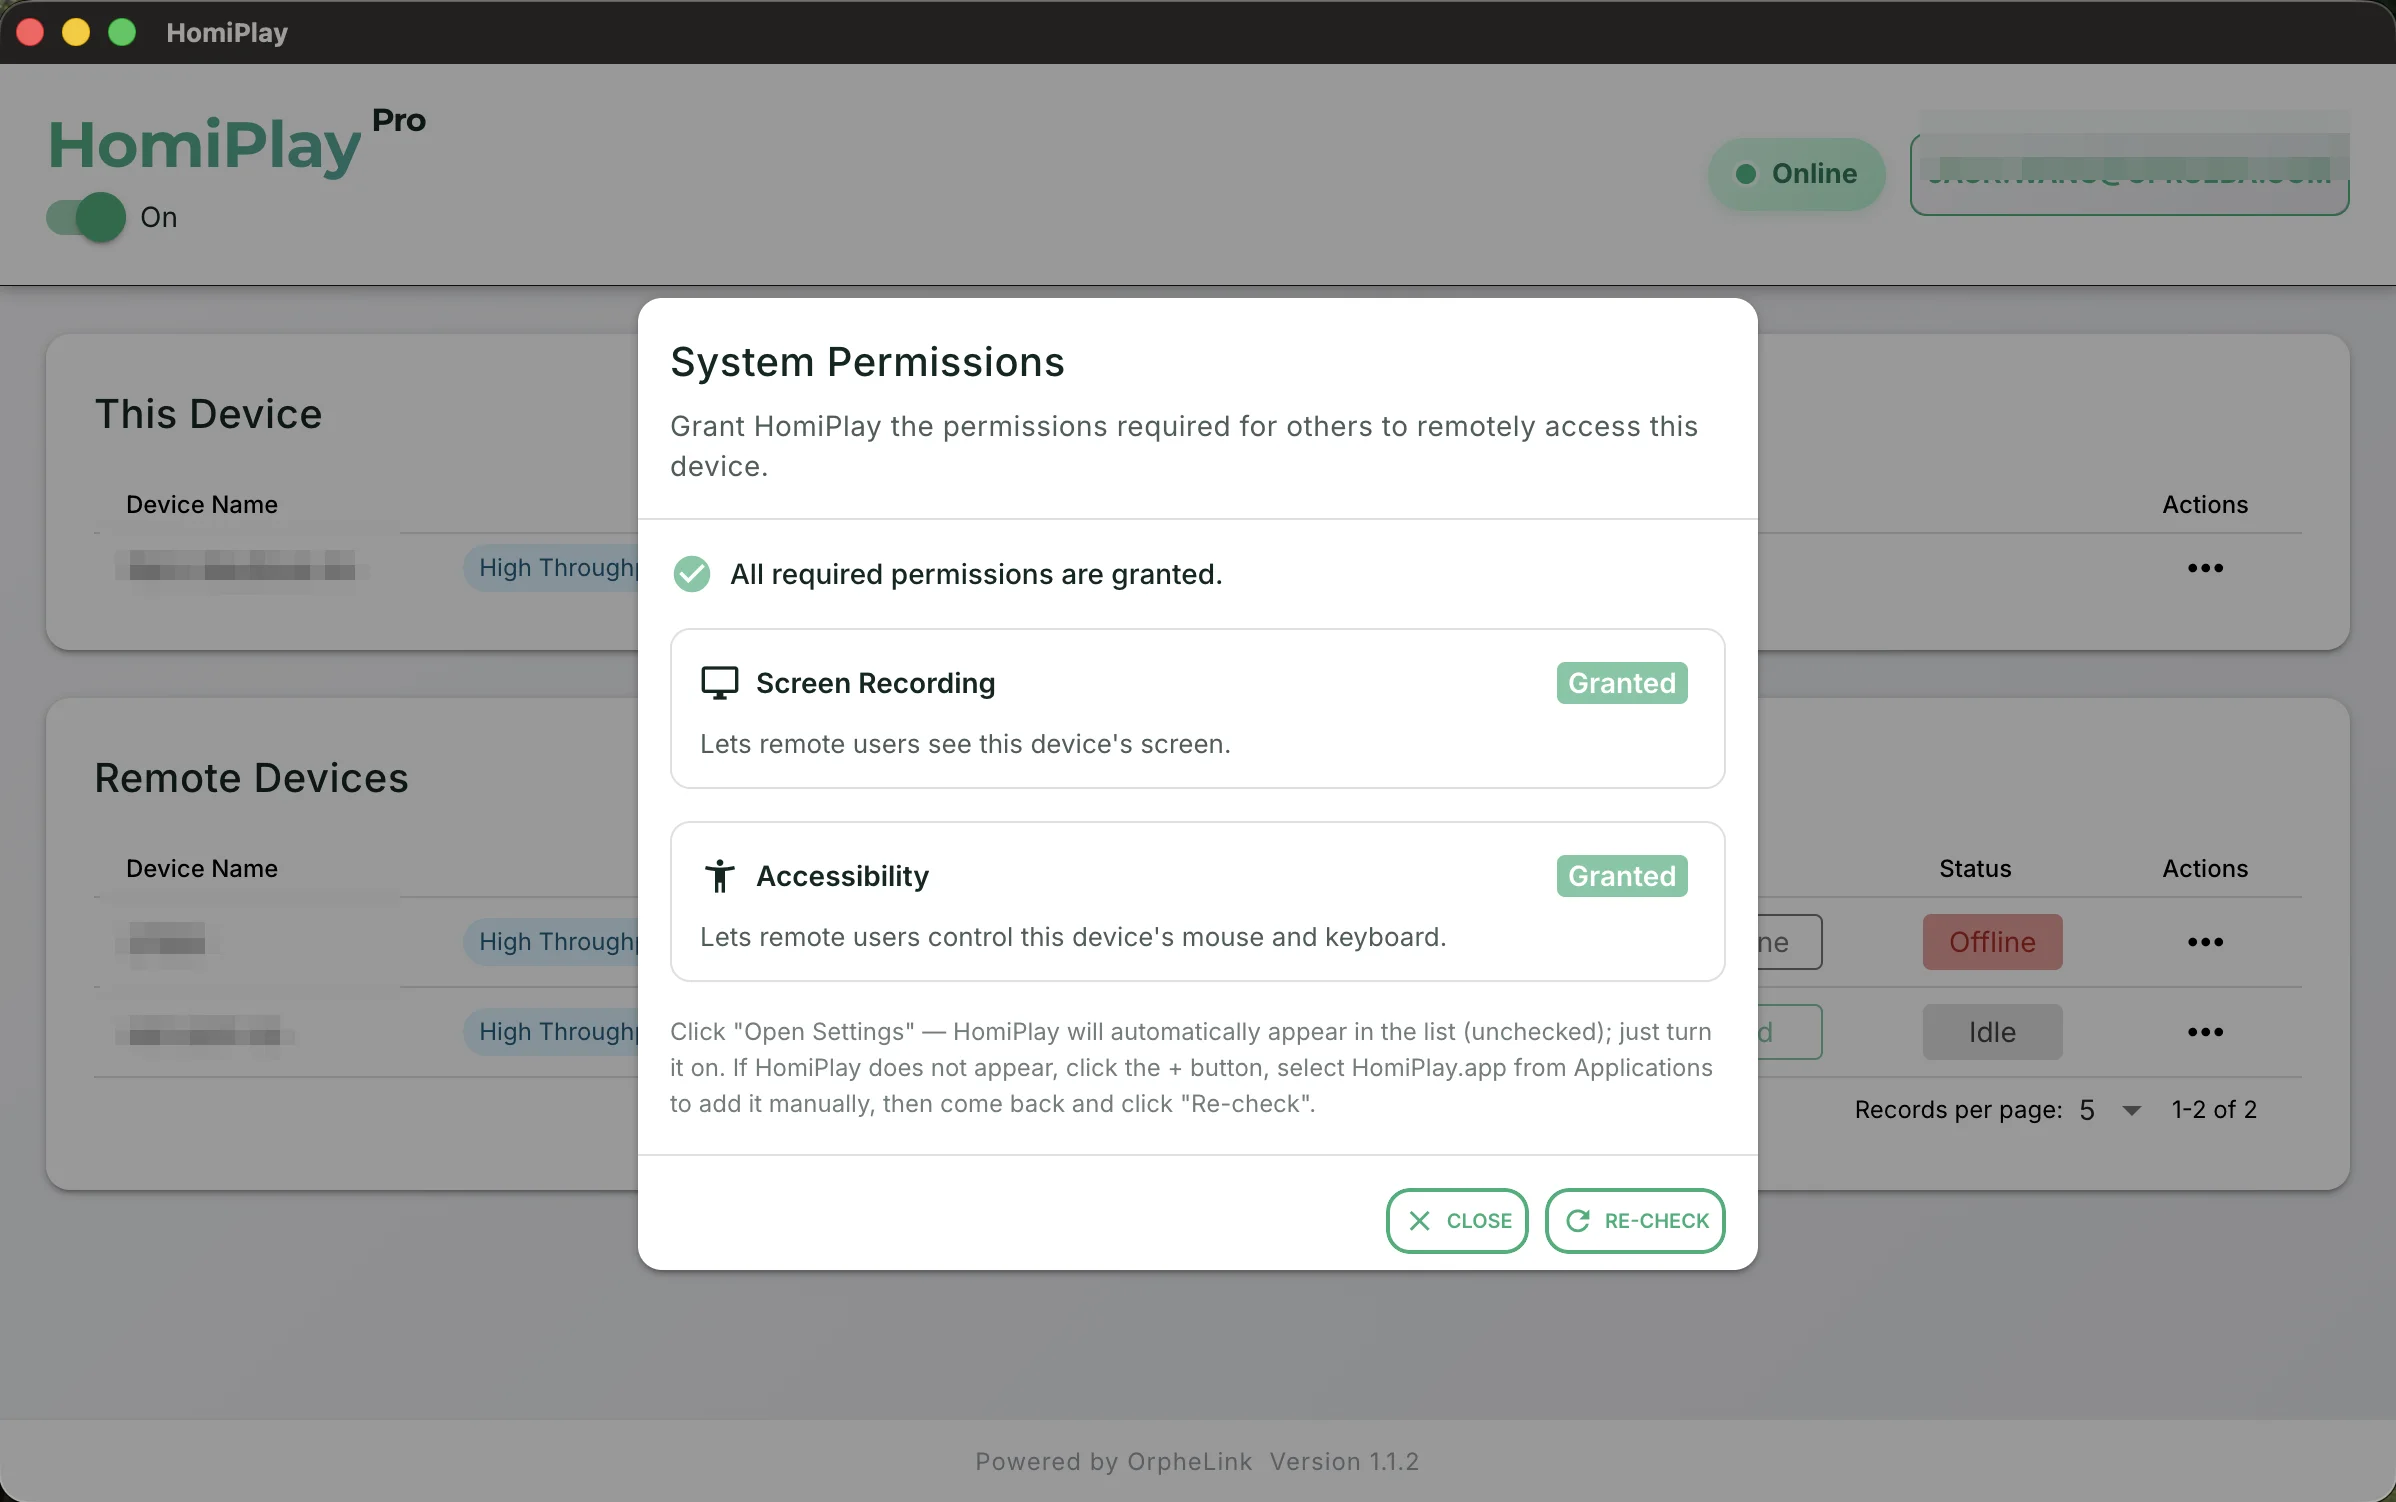
Grant the Required System Permissions on the Host
If the device being controlled runs macOS, the system will prompt for permissions the first time. Enable "Screen Recording" so the remote side can see the screen, and "Accessibility" so it can control the mouse and keyboard. Click "Open Settings," enable HomiPlay in the list, then return to the app and click "Recheck."
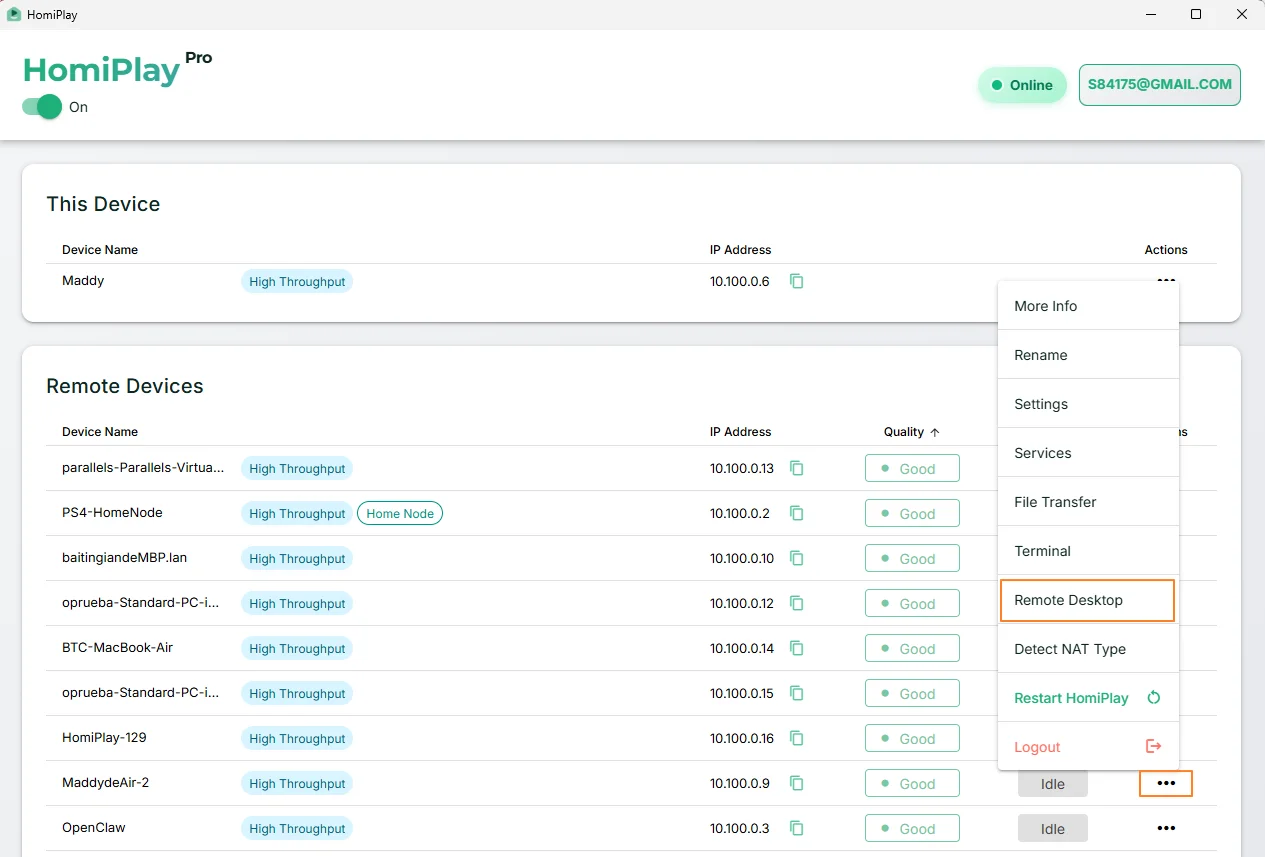
Open "Remote Desktop" from the Device Menu
In the dashboard device list, open the target device's menu and choose "Remote Desktop." HomiPlay opens a remote desktop window and establishes the session directly. There is no IP address to enter and no system remote desktop service to turn on.
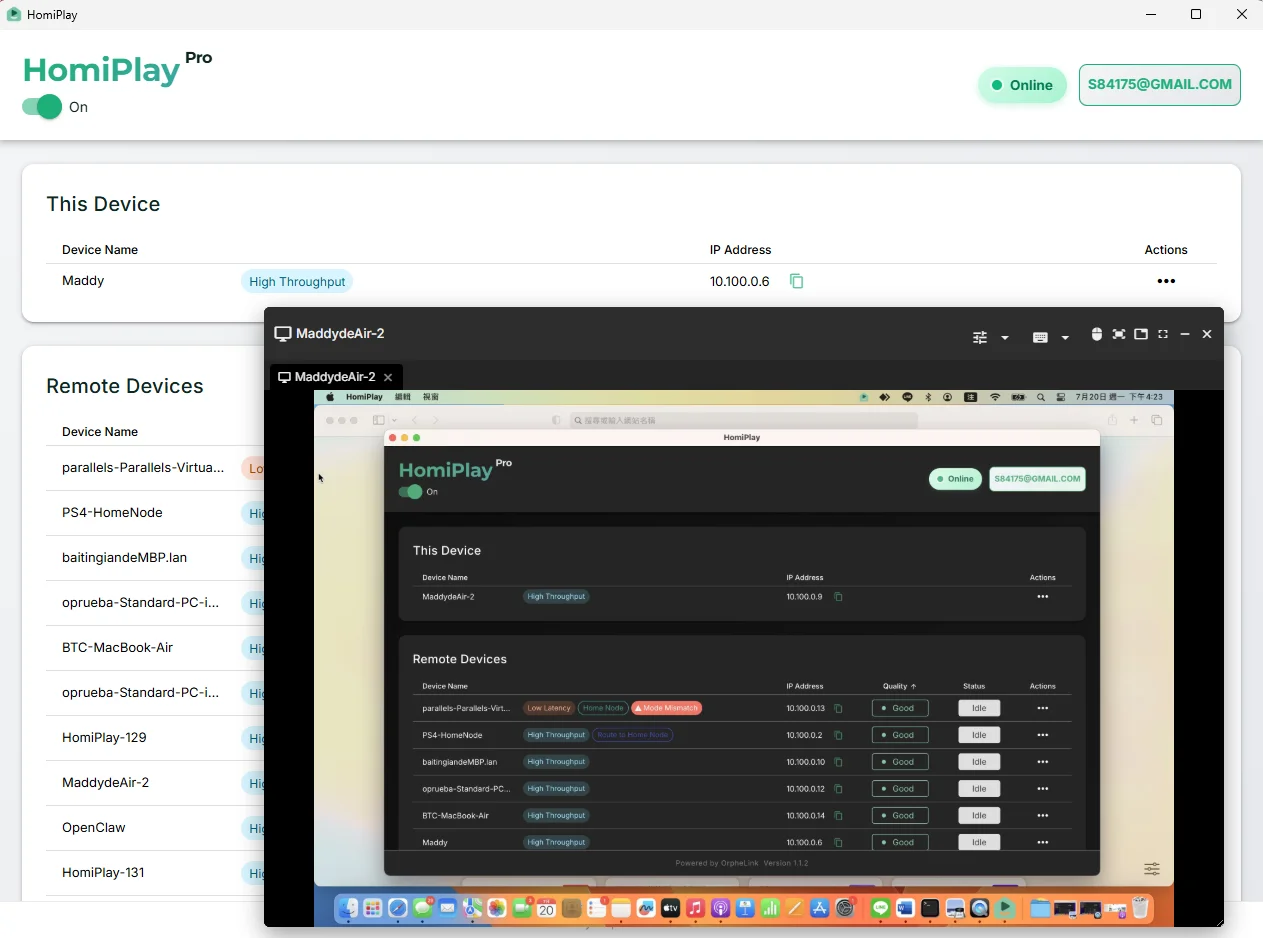
Choose a Display and Quality, Then Take Control
Once connected, use the toolbar to switch displays and adjust quality, then enable "Remote Control" to drive the mouse and keyboard. For cross-platform sessions, turn on shortcut translation so your local shortcuts map to the remote operating system.
Other Use Cases
Play your PS5 remotely just like you're at home.
Connect faster, play without lag, and enjoy clear visuals.
Learn MoreAccess Your Home NAS via HomiPlay
Securely and quickly access files, photos, and multimedia on your home NAS from anywhere.
Learn MoreMobile | Cross-platform remote desktop, one tap from the device menu
Works across Windows, macOS, Linux, Android, iPhone, and iPad. HomiPlay builds a secure virtual network between your devices and opens remote desktop right inside the app. No VPN, no static IP, no port forwarding.
Learn MoreDesktop | Move files between your devices with side-by-side folders
Open File Transfer inside HomiPlay to browse local and remote folders side by side and upload or download directly. No cloud drive or USB stick in the middle.
Learn MoreMobile | Move files straight from your phone to another device
Open File Transfer inside HomiPlay to browse remote folders and upload straight from your photo library or files. No cloud drive or USB stick in the middle.
Learn MoreStay safe on public WiFi with your own VPN.
Route your connection back home so your data is no longer exposed.
Learn More