Desktop | Move files between your devices with side-by-side folders
No uploading to the cloud first, and no emailing files to yourself
Files move straight between your own devices, on a shorter and more private path
Overview
Moving a file from one computer to another usually means uploading it to a cloud drive, emailing it to yourself, or walking a USB stick across the room. Large files make you wait through two transfers, and your data takes a detour through someone else's service.
HomiPlay has file transfer built in. It creates a secure virtual network between your devices so files move directly from one to the other. The dialog splits into "Local device" on the left and "Remote device" on the right, and both sides let you browse folders, go up a level, create a new folder, and refresh.
Pick a file and click Upload or Download to start. Live transfer speed is shown while it runs, and you can cancel at any point. If the remote device requires an access password, you are prompted for it first, so only you can reach those files.
⚡ More direct: No cloud relay and no physical drive. The file goes where it needs to in one hop.
🔐 More private: Your data never passes through a third-party cloud service.
🗂️ Easier to navigate: The two-pane layout keeps source and destination visible at once.
Benefits
Skips the upload-then-download round trip, so large files do not make you wait twice
Local and remote folders sit side by side, keeping source and destination clear
Browse, go up a level, create folders, and refresh, so you can organize files right where they land
Live transfer speed while it runs, and you can cancel at any time
Remote devices can require an access password to prevent unauthorized access
Files never pass through a third-party cloud service and stay between your own devices
How It Works
Install HomiPlay on Both Devices and Sign In
Install HomiPlay on both devices and sign in to the same account, then return to the dashboard and confirm the target device shows as "online." Note: file transfer supports Windows, macOS, Linux, Android, iPhone, and iPad.
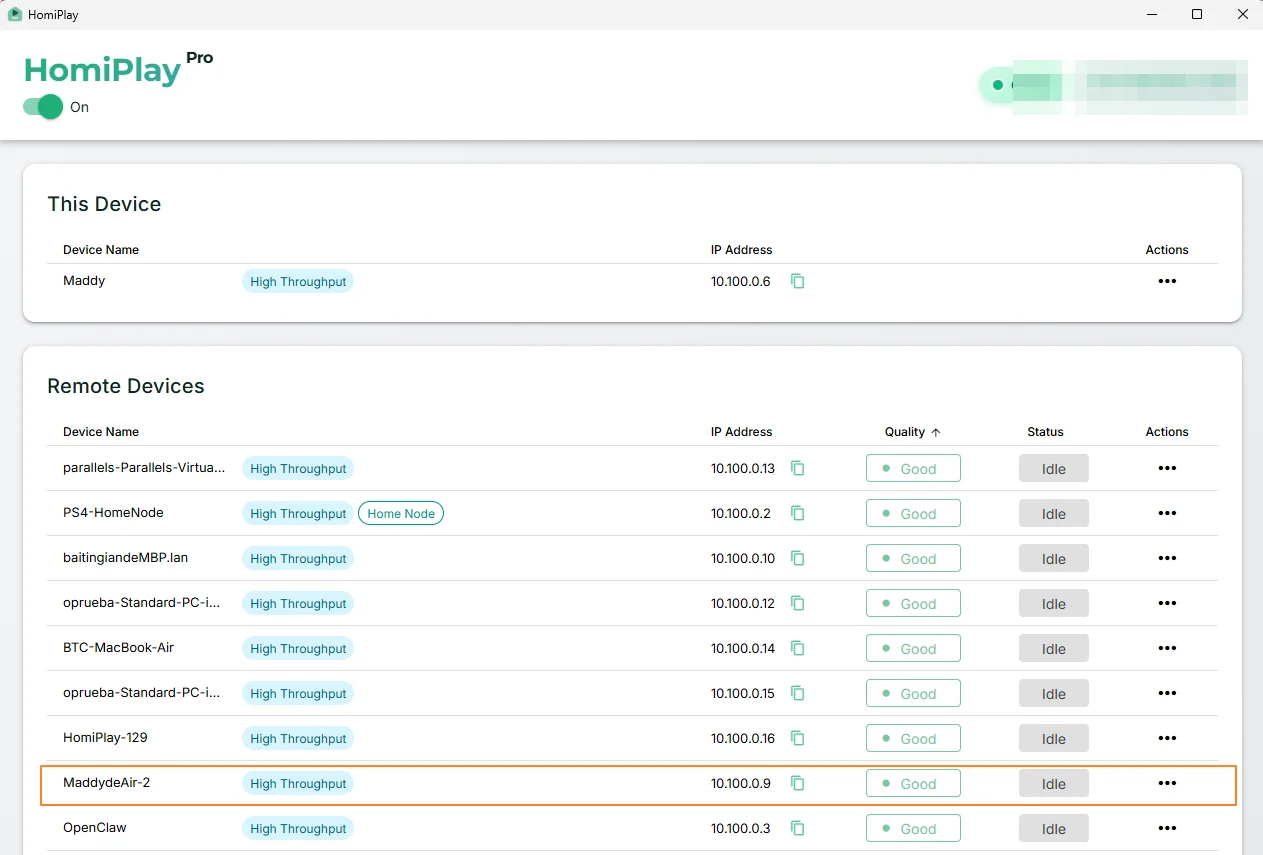
Open "File Transfer" from the Device Menu
In the dashboard device list, open the target device's menu and choose "File Transfer." If that device has an access password set, you will be prompted to enter it before the remote file list loads.
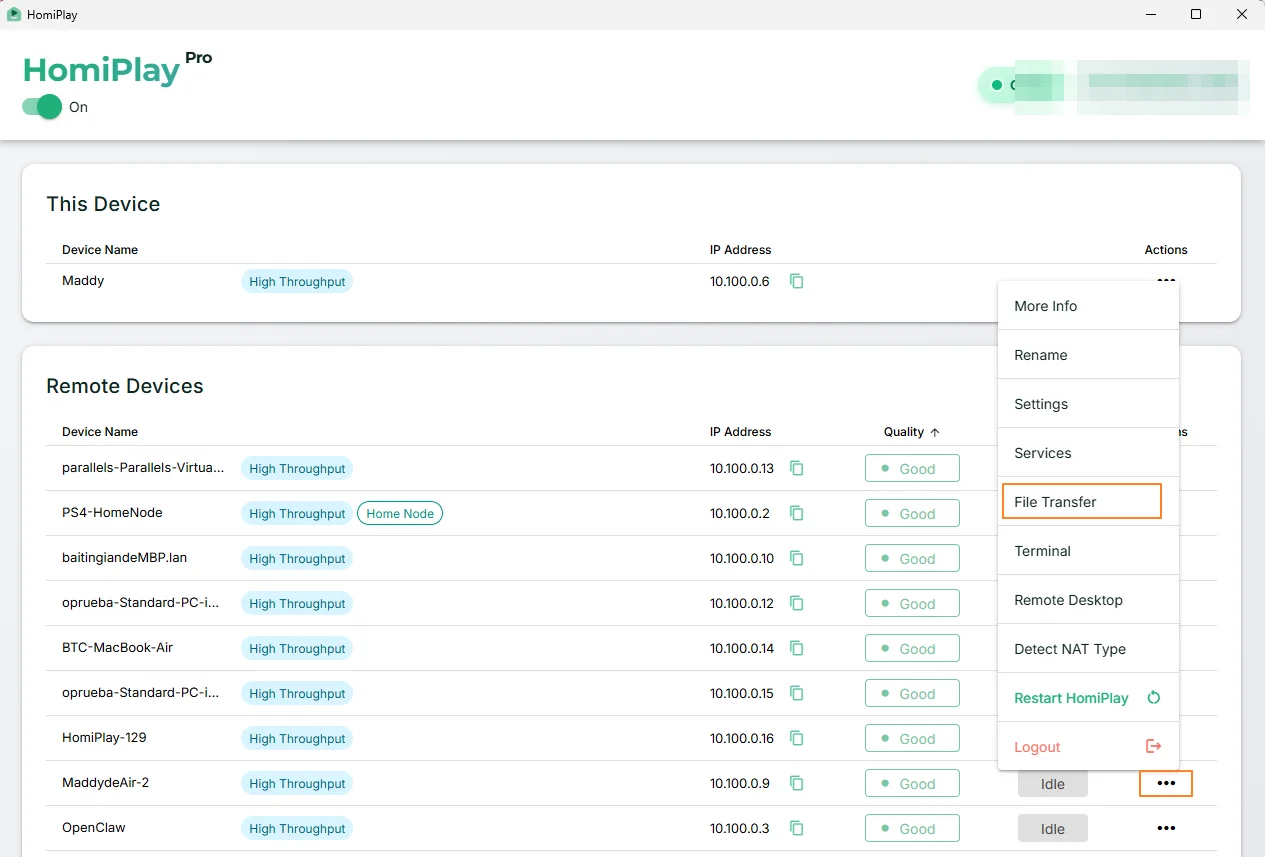
Browse Local and Remote Folders Side by Side
The left pane is your "Local device" and the right pane is the "Remote device." On either side you can open folders, use "Parent folder" to go back, click "Refresh" to reload the list, and use "New folder" to create a destination.
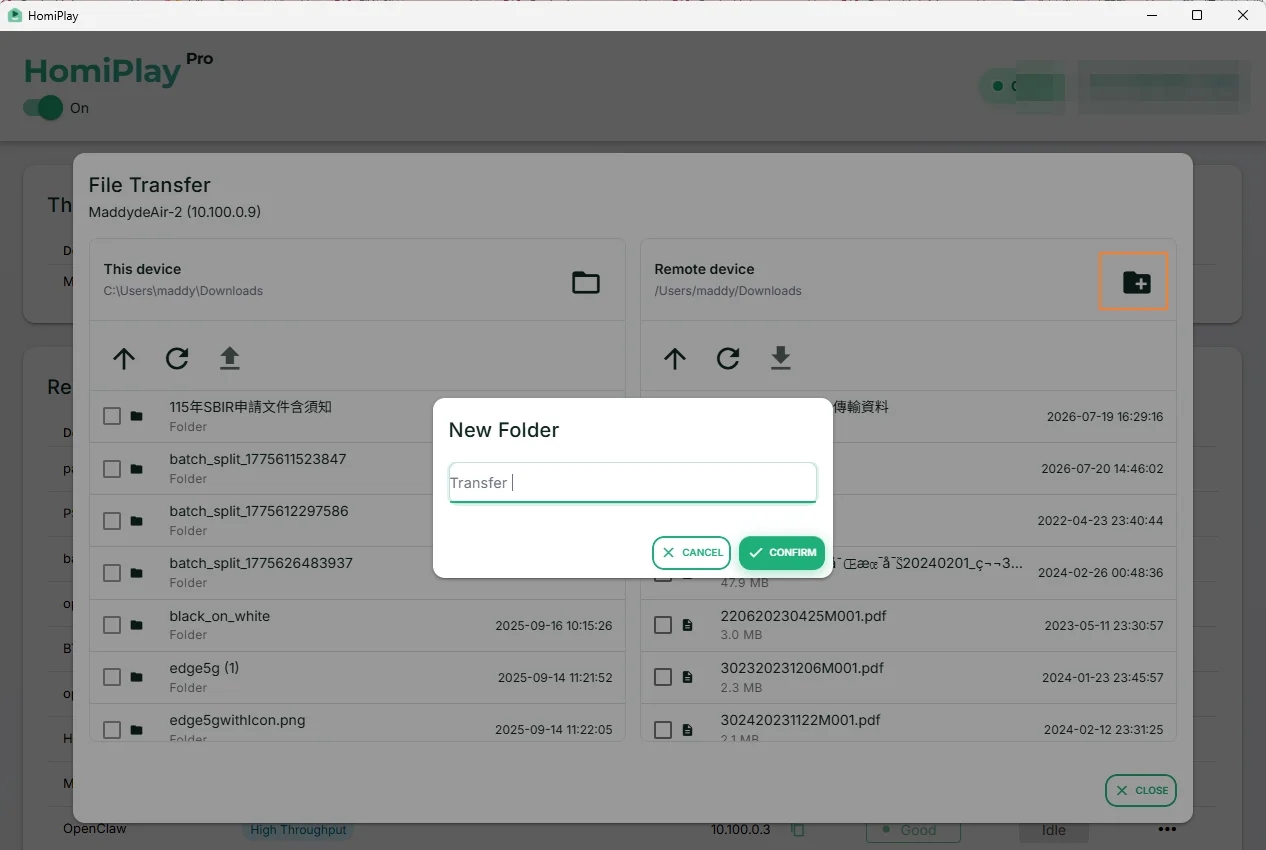
Select a File, Then Upload or Download
Select a file on the local side and click "Upload" to send it to the folder currently open on the remote side. Select a file on the remote side and click "Download" to save it into your local folder. Transfer speed is shown live, you get a confirmation when it finishes, and you can cancel midway if needed.
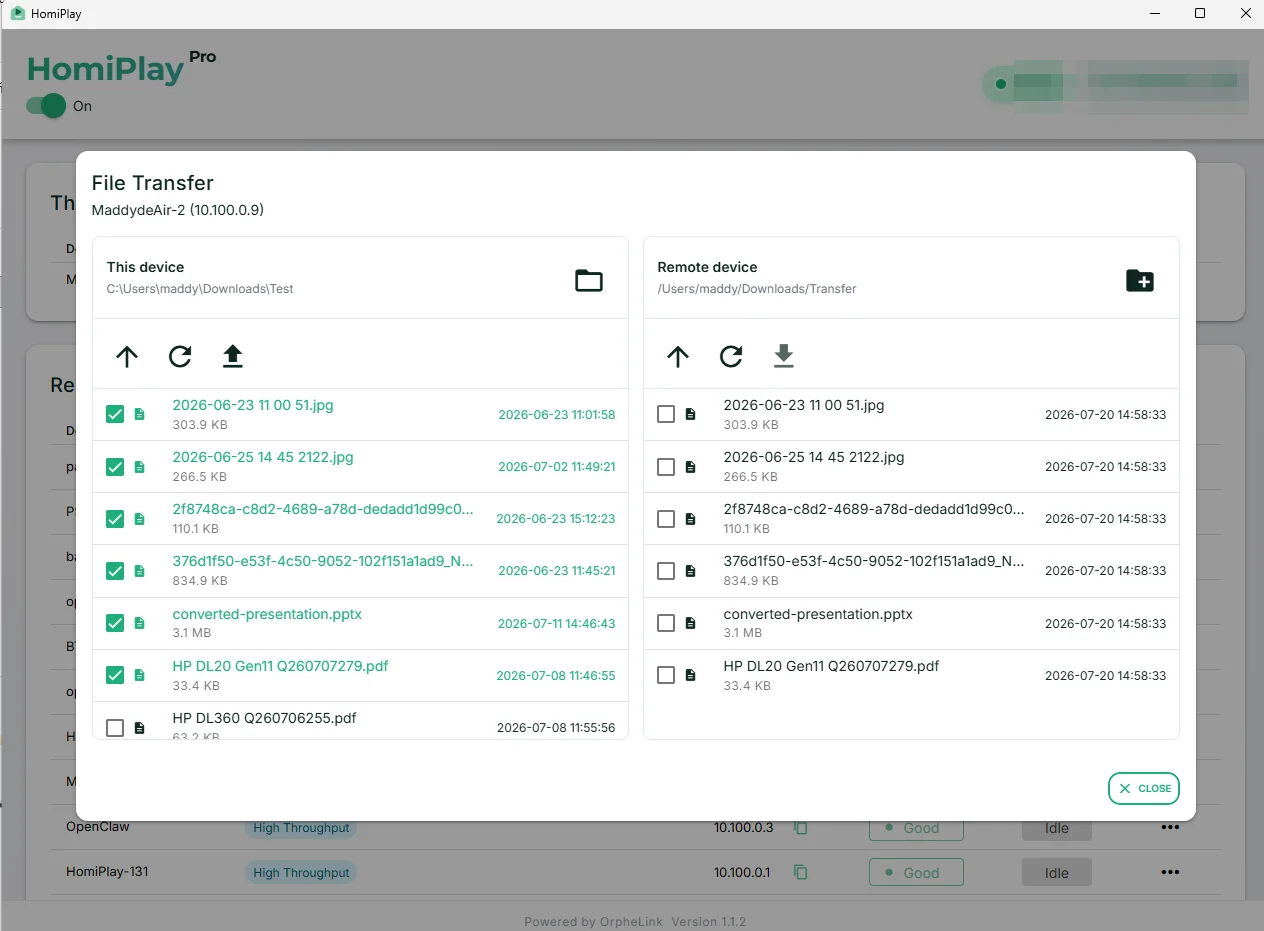
Finish the Transfer
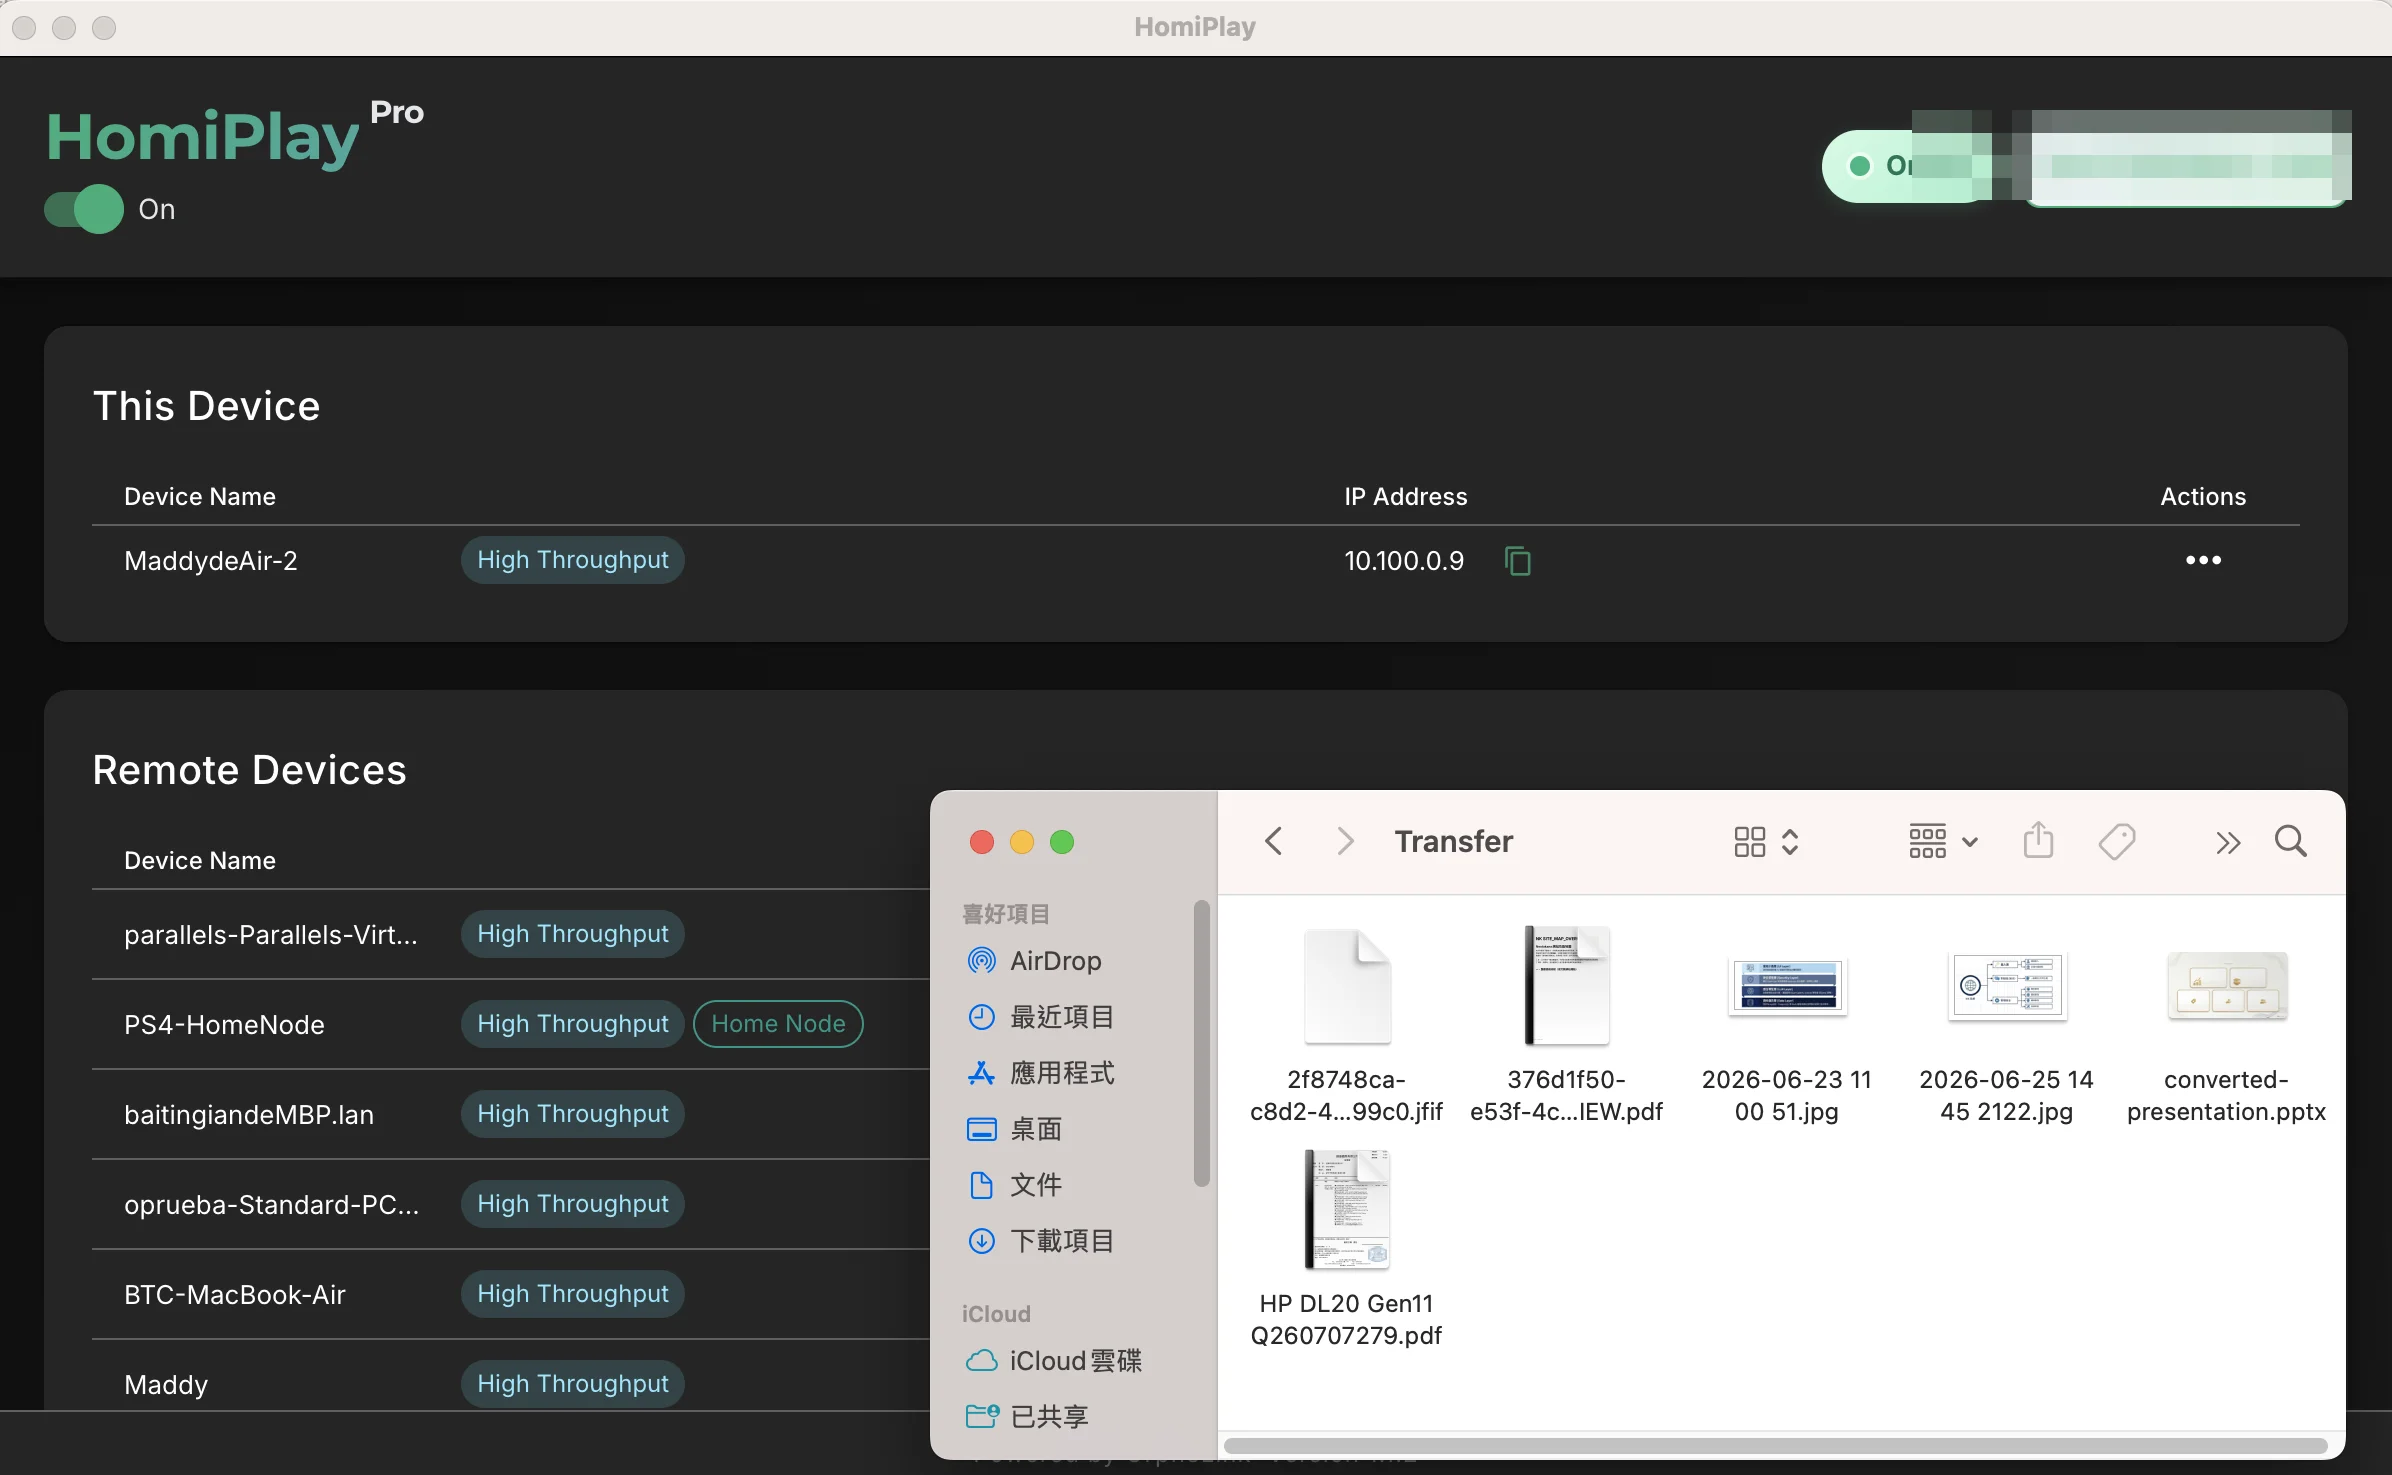
A confirmation appears once the transfer completes. Open the destination folder you chose in Finder or File Explorer and the files are already there, stored in their original format as ordinary files. Nothing needs to be exported from the app, so you can open or keep editing them right away.
Other Use Cases
Play your PS5 remotely just like you're at home.
Connect faster, play without lag, and enjoy clear visuals.
Learn MoreAccess Your Home NAS via HomiPlay
Securely and quickly access files, photos, and multimedia on your home NAS from anywhere.
Learn MoreDesktop | Cross-platform remote desktop, one click from the device menu
Works across Windows, macOS, Linux, Android, iPhone, and iPad. HomiPlay builds a secure virtual network between your devices and opens remote desktop right inside the app. No VPN, no static IP, no port forwarding.
Learn MoreMobile | Cross-platform remote desktop, one tap from the device menu
Works across Windows, macOS, Linux, Android, iPhone, and iPad. HomiPlay builds a secure virtual network between your devices and opens remote desktop right inside the app. No VPN, no static IP, no port forwarding.
Learn MoreMobile | Move files straight from your phone to another device
Open File Transfer inside HomiPlay to browse remote folders and upload straight from your photo library or files. No cloud drive or USB stick in the middle.
Learn MoreStay safe on public WiFi with your own VPN.
Route your connection back home so your data is no longer exposed.
Learn More